
Fusion 360 Shell Command: Pro Tips for Hollowing and Holders
Apr 17, 2025Intro: Why Shelling Matters
The Shell command in Fusion 360 is incredibly powerful for creating hollow designs, complex internal geometry, or custom holders for 3D printed components. But getting it right requires understanding how selection, thickness direction, and tool order affect your outcome.
This tutorial walks you through:
- The basics of using Shell
- Gotchas like thickness direction and face removal
- How to design complex holders with Shell and Split Face
- Pro tips for clean 3D prints and adjustable thickness
Table of Contents
- Shell Tool Basics
- Face Selection and Default Behavior
- Inside vs Outside vs Both
- Rounded Shell Edges
- Stacking Shells for Complex Designs
- Adjusting Wall Thickness After Shell
- Shelling a Copy for a Custom Holder
- Wrap-Up
Shell Type Options
Shell Tool Basics
When you open the Shell command from the Modify menu, what you select first matters.
- If you select nothing on the model and just the body in the browser, Fusion will shell everything uniformly from the inside.
- Default thickness will be applied to all faces except those specifically removed.
Face Selection and Default Behavior
Want to remove a face (like a lid or top)?
- Select that face before applying Shell.
- Selected faces are removed.
- Fusion maintains the rest of the model with the chosen wall thickness.
- Use Section Analysis to confirm what’s happening inside the part.
Inside vs Outside vs Both
Shell gives you 3 thickness directions:
- Inside: Thickness is added inward. Outer dimensions remain the same.
- Outside: Thickness is added outward. Your part grows in size.
- Both: Adds thickness inward and outward. Useful for specialized cases.
Example:
- A 100 mm cube, shelled with 10 mm inside → cube still measures 100 mm
- Shelling 10 mm outside → cube becomes 120 mm total (adds 10 mm to each side)
Rounded Shell Edges
When shelling to the outside, you can enable Rounded Shell to apply automatic fillets to the new outer edges.
- Great for smoothing your print or design
- Works best when you're shelling a uniform body and want softer corners
Stacking Shells for Complex Designs
Want custom supports or cutaways? Try multiple shell commands:
- First, shell at a basic 5 mm with selected faces removed.
- Use Repeat Shell to add another layer of shelling — e.g. to the base or sides.
- Each command builds on the result of the last, allowing cool designs like square tubing or frames.
Pro Tip: Shelling bottom faces later gives you a boxed frame look, while doing it first creates an entirely different structure.
Adjusting Wall Thickness After Shell
Shell creates uniform thickness — but what if you want one wall to be thicker?
- Use Q (Press Pull) on a selected face.
- Switch to New Offset instead of Automatic to avoid changing the whole model.
- Adjust one wall independently — ideal for strengthening or adding support.
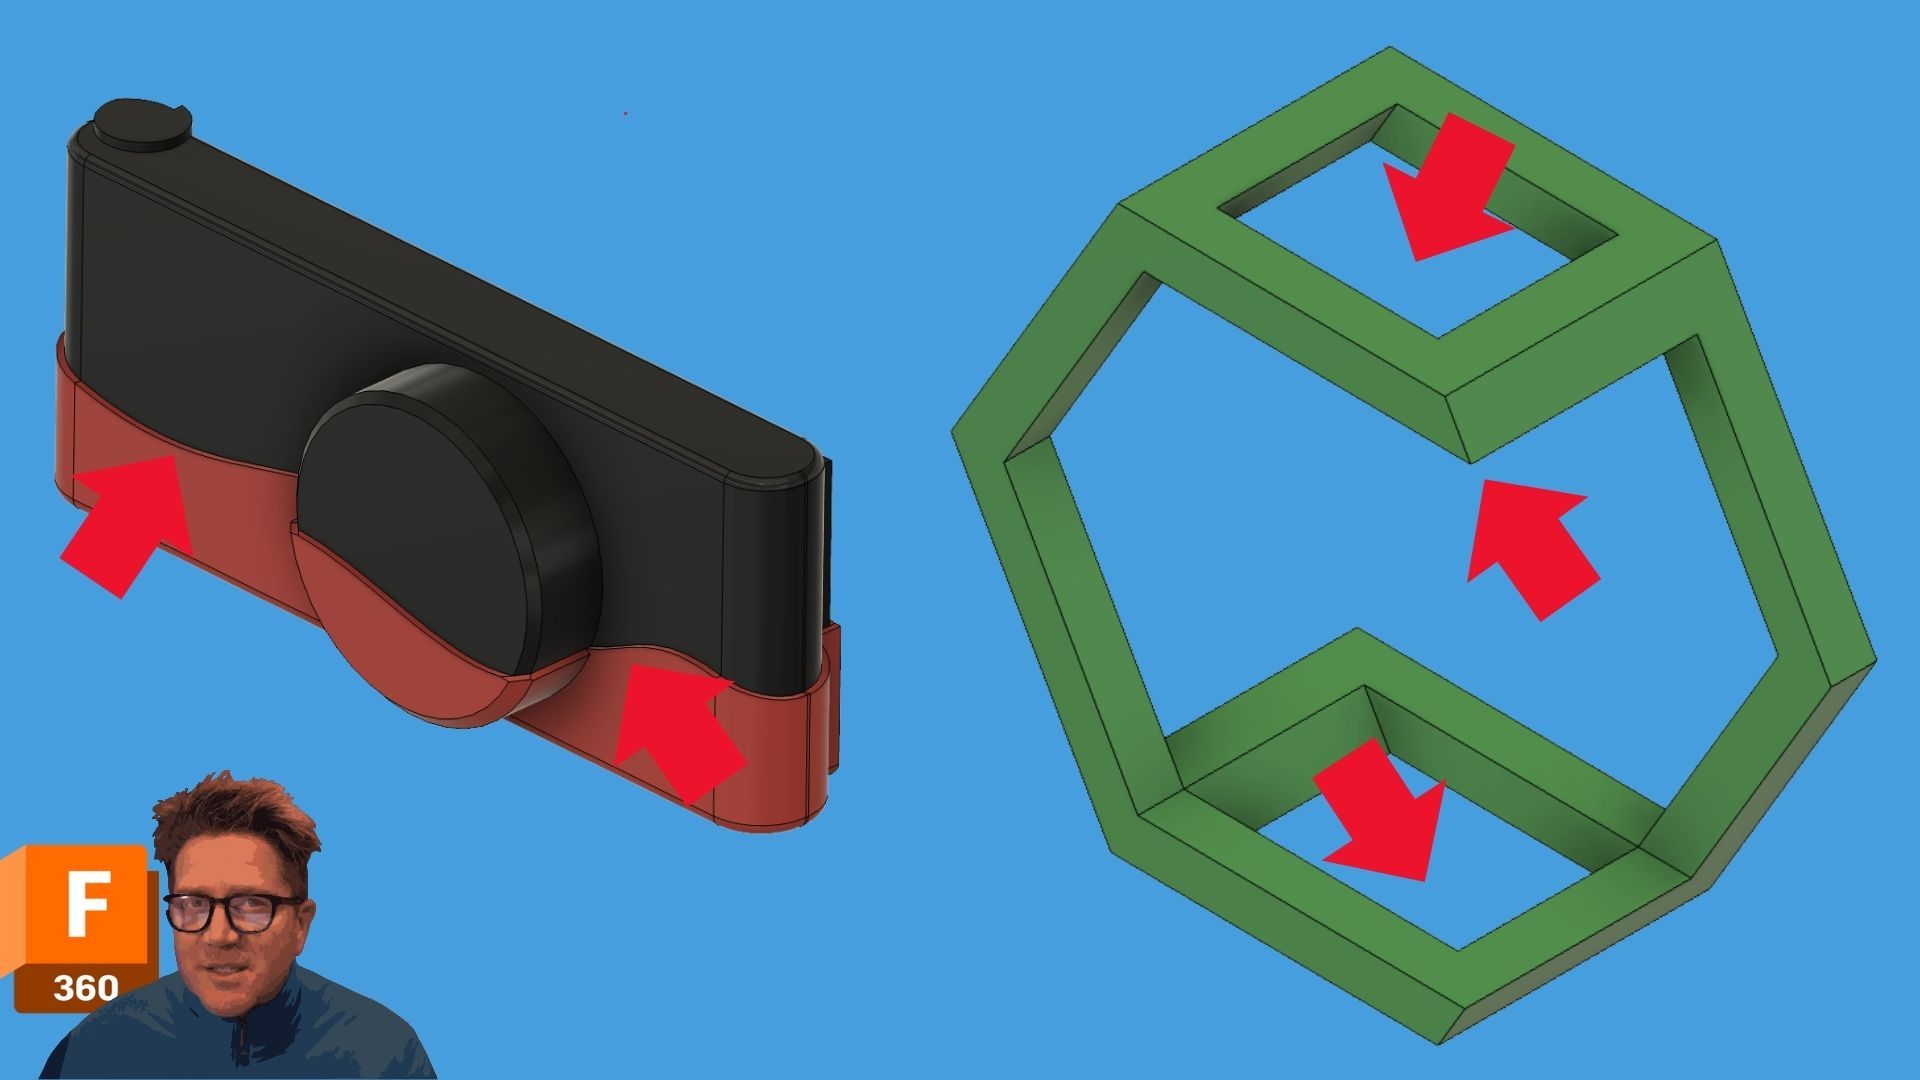
Shelling a Copy for a Custom Holder
Here’s a powerful use-case: make a camera or component holder.
Steps:
- Copy and paste your body (or component)
- Hide the original
- Change the material color (optional, for clarity)
- Sketch and Split Face to define your separation area
- Use Window Selection to select just the top faces
- Turn off Tangent Chain for precision
- Apply Shell with:
- 2 mm thickness
- Outside direction
Now you’ve created a custom-fit holder. Add a little extra clearance if you’re 3D printing to account for shrinkage.
Wrap-Up
The Shell command is one of the most underrated tools in Fusion 360.
- Perfect for creating enclosures, internal cavities, or lightweight structures
- Stack multiple shells for creative effects
- Combine with Split Face and Q (Press Pull) to customize any part
Watch the Full Video
Prefer video? Watch the full tutorial here:
Embed your video below this line 👇
