
How to Create a Plane Through Two Edges in Fusion 360 (Quick Tutorial)
Apr 30, 2025Table of Contents
- Introduction: Why Use a Plane Through Two Edges?
- How to Create the Plane
- What Edges Can Be Selected
- Tips for Troubleshooting
- Conclusion: Simple but Powerful Tool
- Key Takeaways
- Expandable Transcript
🎥 Watch the Tutorial
Introduction: Why Use a Plane Through Two Edges?
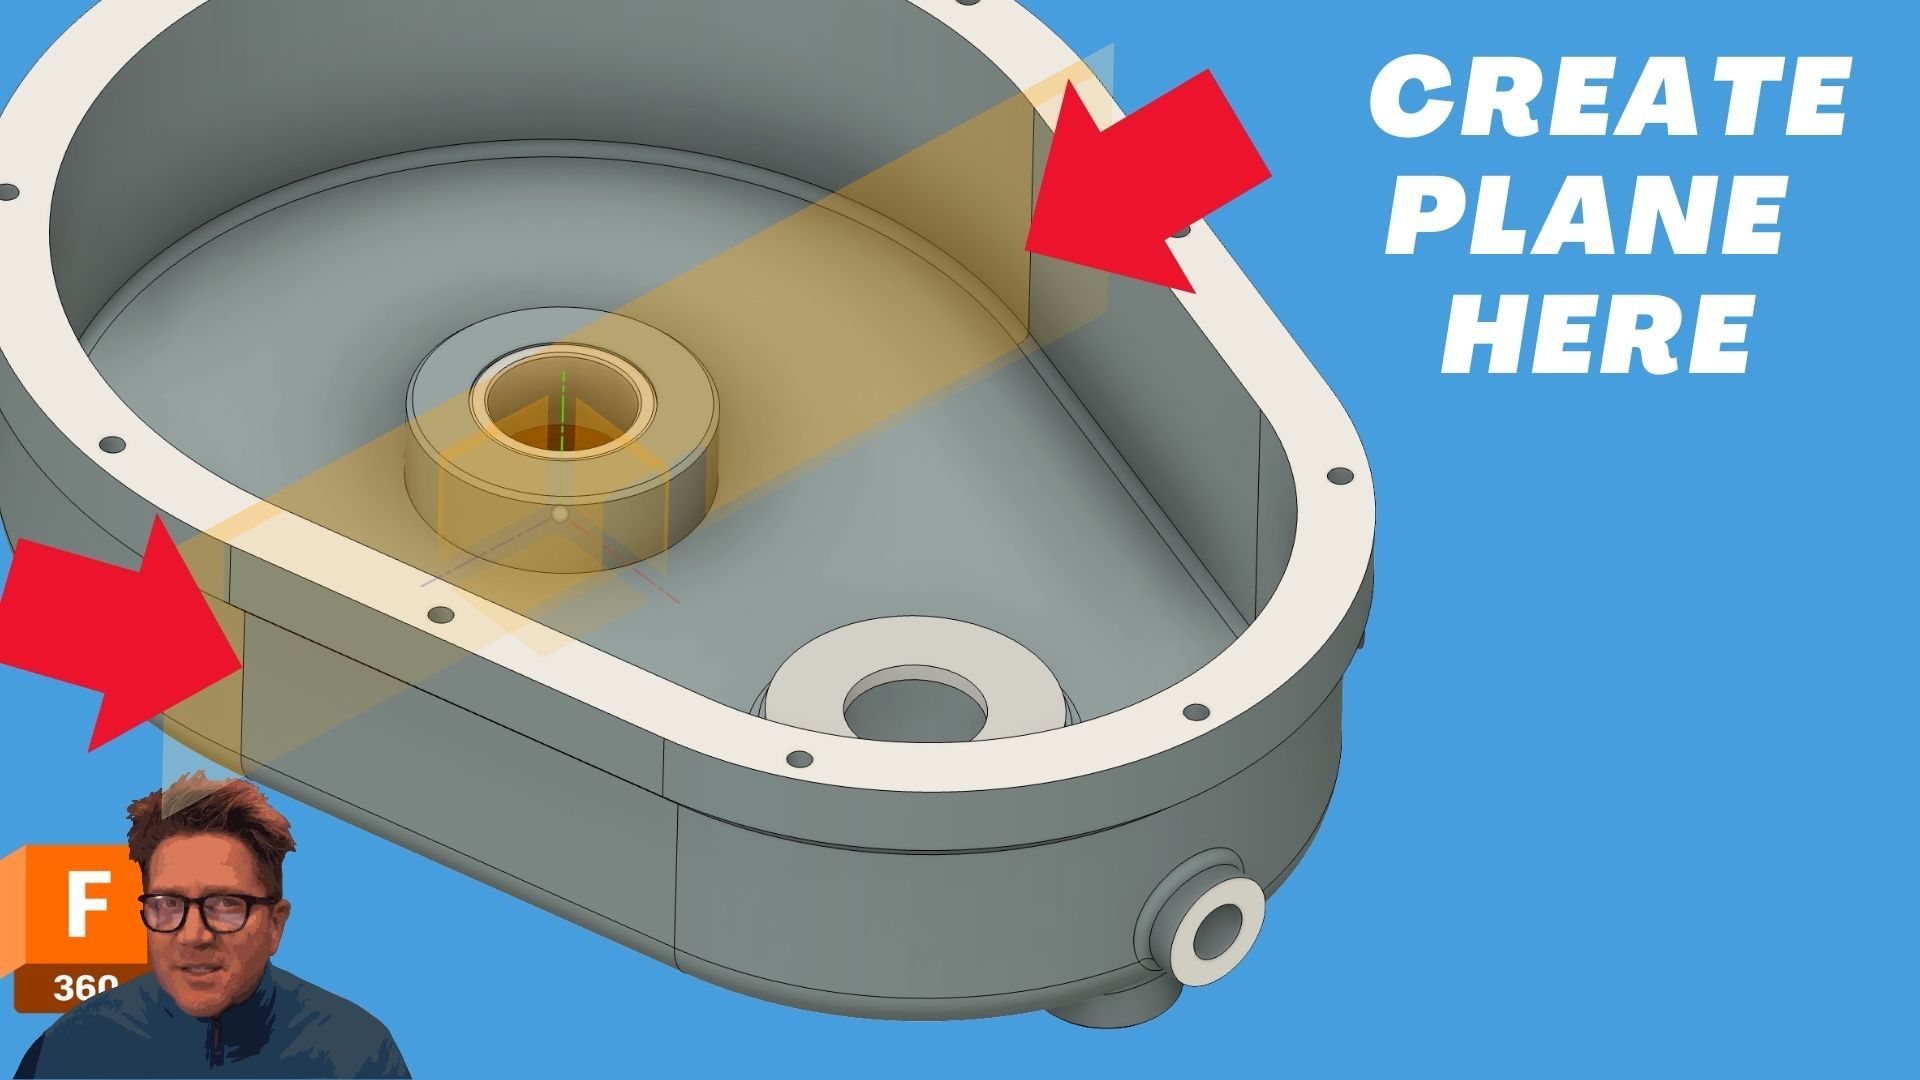
Fusion 360 gives you the ability to create a construction plane that passes through any two edges, allowing you to sketch and build features between angled or offset geometry. This tool is perfect for creating custom cuts, holes, or connectors where the standard planes just don’t line up with your design intent.
How to Create the Plane
- Go to Construct > Plane Through Two Edges
- Click on two edges — they can be model edges, sketch lines, or even reference axes
- A construction plane will appear connecting both edges
- Start a new sketch on that plane and build away!
What Edges Can Be Selected
✅ You can select:
- Flat edges from solids
- Linear sketch entities
- Reference axes
🚫 Avoid:
- Rounded or curved edges
- Edges Fusion 360 can’t compute — these won’t highlight or respond
Tips for Troubleshooting
- No plane appearing? One or both edges may be curved or incompatible
- Try using a sketch line instead of a complex body edge
- Reference axes + model edges can be a great combo
💡 Bonus Tip: Use this when aligning across two disconnected bodies or when your design isn’t on the global plane.
Conclusion: Simple but Powerful Tool
The Plane Through Two Edges tool is a low-effort, high-impact feature in Fusion 360. It gives you the flexibility to sketch and model between irregular or offset parts of your design without having to build extra geometry. It’s a great solution to keep in your toolbox for real-world design challenges.
Key Takeaways
- ✔ Use the Plane Through Two Edges tool to create a sketch plane from any two valid edges
- ✔ Works with model edges, sketch lines, and reference axes
- ✔ Won’t work on curved edges — watch for the lack of highlighting
- ✔ Great for angled cuts, features between bodies, and precise midpoints
Expandable Transcript
0:02 – Ability to select two edges and create a construction plane that you can now sketch and design features on. 0:10 – It's very easy to do: just go to Construct > Plane Through Two Edges. 0:13 – Select two edges that you'd like your plane to run through. You can now create a sketch and add features at this location. 0:23 – Gotcha: if you try to select a round or unsupported edge, Fusion won’t highlight or create the plane. 0:36 – If it's solvable, the plane will appear. Here, we can create a plane between these two edges. 0:44 – You can also use reference axes. For example, select a reference axis and an edge — and it works. 0:55 – You can even mix sketch lines and solid edges, as long as they’re linear and solvable. 1:02 – Hope this helps — see you in the next one!Click to expand the full video transcript (with timestamps)
